PhotoShop Tutorial: How to Create a Dark Angel Effect for Your Image
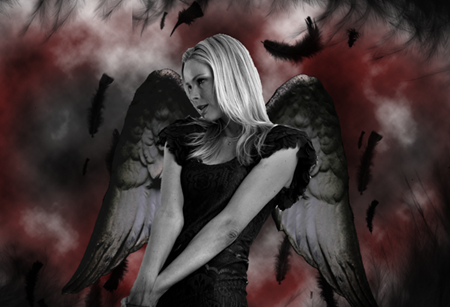
In this tutorial, you will learn how to convert a simple model image to a dark angel in Photoshop. We will be using free online resources in this tutorial to…
In this tutorial, you will learn how to convert a simple model image to a dark angel in Photoshop. We will be using free online resources in this tutorial to…
This time I will make something you usually see in the magazines – a car advertisment. During the tutorial I will use mostly the same techniques as in the Glowing…
HDR stands for high dynamic range. It’s basically an image with dark blacks and bright whites. This creates a strong contrast between the colors and tones. HDR is usually achieved…
The cropping tool in Photoshop is much more than just drag, outline and crop. 90% of us probably don’t utilize it to its full effect. Here are some five simple but essential tips to get you cropping in Photoshop like a pro.
This tutorial shows how to make cool ad or poster and as example I will make it to look like Absolut Vodka. We will start with stock photo of a…
Retro color effect is indeed very popular. A quick search in Google brings up endless of Photoshop tutorials. However, this tutorial is probably one of my favorites to achieve a retro color effect. Simply because it’s quick, easy and thinks outside the box.