
I have many times been asked what some of the terms in photography mean and how they affect a photograph. I have also heard many of the terms used incorrectly. They are heard so often in advertising and even in passing that people use them in every day speech without really knowing how they are used functionally in photography. It can only make you a better photographer by understanding your camera and its tools better. Most of these are most likely a refresher for many photographers but for some people, they do not come into play consciously because of the usability and function of their camera. Many “point and shoot” cameras use these but do all the figuring out for you. This adds a sense of freedom but also less control over each shot.
Almost every term that comes into play refers to the major component in photography; light. The functions on your camera (and when developing film and prints in the darkroom), overall, control the amount of light exposure. Before digital components were added to cameras, the function of the camera and understanding your photographs was understanding the lighting and how to manipulate and use it to your advantage. I am only naming some of the terms and practices here. These are the most used and the most basic to understanding photography, but they are by no means all of the techniques and practices used by photographers. This also does not go into the terms used in the darkroom when developing film and prints (many of which are the same as in the camera).
1. Aperture
This is also sometimes referred to as the F-Stop (on your camera lens, for example, it may show f/1.4-f/16mm) or focal length.

Nikkor 35mm f/2 AF-D lens set on f/8
A very technical definition is that an aperture is a hole or an opening through which light travels. In a camera’s optical system, it is the opening that determines the cone angle of a bundle of light rays that come to into focus in your plane of view.

Minolta f/1.4-f/14 aperture lens
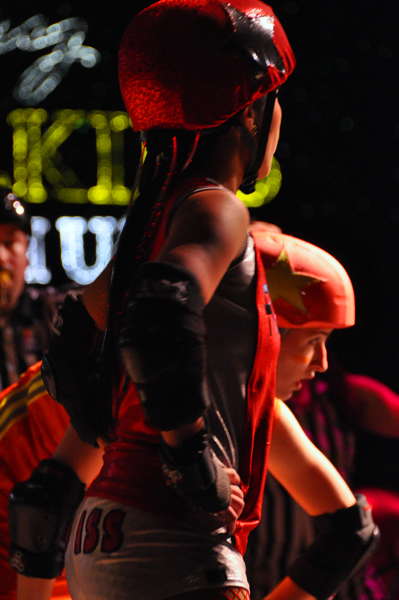
The size of an f-stop affects the depth of field (the portion of a scene that appears in focus in the image). Smaller stops (larger f numbers) create a longer depth of field. This allows a wide scene of objects of a larger distance to be in focus at the same time.
©Elizabeth Anderson, 2010 www.design-flip.com
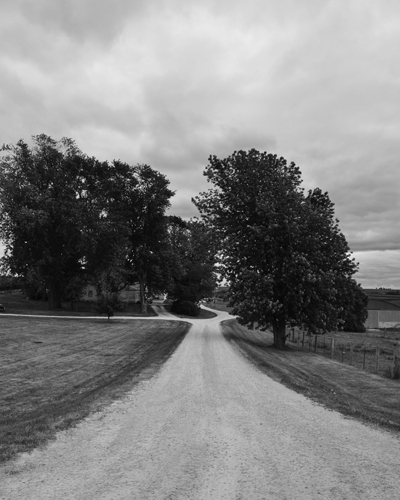
The opposite is true of larger stops (smaller f numbers). This aperture will often produce the objects in the immediate foreground to be in focus while the background is blurred. The further you move away from the camera, the more blurred they will become.
©Elizabeth Anderson 2010 www.design-flip.com
The f-stop will also determine whether or not the image will be vignetted. This is when the edges of your photograph have blurred, rounded, dark edges. Larger stops can also create optical distortion of image (a “fish-eye” lens view). This happens when the view and opening through your lens is larger than your actual range of sight. The horizon and edges will tend to bend in the image.
2. Shutter Speed
This is often set by photographers, in conjunction with the aperture on the camera. Shutter speed is used to describe the exposure time a camera’s shutter is open. The longer the shutter is open, the more light it lets into the camera and the more exposed your images become. The light is either exposed to the film itself or, in digital cameras, the sensor. A slower shutter speed can create more of a motion blur effect while a faster one can create a sharp image.

Effect of different shutter speeds on photograph
A standard set of shutter speeds on a camera (this will depend on your camera) will range from about 1 second-1/1000 of a second. Most people cannot hold a camera at more than 1/60 a second without creating an unwanted motion blur, simply from holding the camera.
The bulb setting on your camera is for very long exposures. It most SLR cameras, the shutter opens the moment you click and will keep exposing until you click the button for a second time. It can create amazing motion effects and expose an image at night to create beautiful lighting.

30 second exposure
3. ISO
ISO (Internal Organization for Standardization) refers to a film’s speed and therefore, possible light exposure. In the digital world, this has been computed into a system of exposure to the digital sensor based on if film were being used. In film, the speed was determined by the size of silver halide in emulsion. The larger the grain, the more sensitive the film.

High grain image
Determining the scale of a film speed is actually fairly complicated. In the ISO arithmetic scale, a doubling of the sensitivity of a film requires a doubling of the numerical film speed value. In general, a higher film speed also equates to less detail in the shot because of increased grain or image noise. The range for film speeds can be anywhere from ISO 11-ISO 3200. Often, higher sensitivity films or ISO are used for night photography.In SLR cameras, the ISO equivalent can be set and changed, depending on the lighting when you are shooting.
4. Light Meter
This is a device used to measure the amount of light being let into an exposure. This will typically include a computer, either digital or analogue, which informs the photographer of which combination of shutter speed and aperture to use to create the correct exposure. As one moves, so does the other. More experienced photographers can do both without any outside help and know which combination works for most settings. In digital SLR formats, you can use external meters or the one built in to your camera. It usually moves up or down 2 stops.
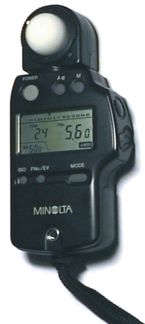
- External Digital Light Meter

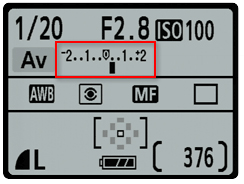
- Internal Light Meter
You can choose to select both manually, or choose one and the camera will fill in the other number based on your choice. Light metering can also lead to bracketed exposures where the photographer takes the same shot several times at different exposures to make sure the lighting is correct. Most of the time, your goal is to have line in the internal light meter be in the middle.
This is just a small example of photography terms and how they are used to manipulate and closely understand your shots. Many photographers experience them in their own way and have techniques for using them to their advantage. No one way is correct and many times it depends on your style, equipment, level of experience and the lighting available. My experience in the way to understand them better is to get to know your camera very well and experiment in different situations. Please leave comments about ones I may have missed and I can maybe add a supplement to this list!

