Creating an Action Sequence Photo in Photoshop
Flip through a sports magazine or newspaper and you’d probably see an action sequence shot. It’s where a continuous action is stitched together and presented in one photo. It looks pretty nifty and here’s how you can re-create this effect in Photoshop in just 7 steps.
1.) Choose the Right Action
The most difficult part of creating an action sequence photo is actually finding the right action. After some trial and error, I found linear and predictable action to be much easier to shoot. If you know how they’re getting from point A to B, you’d be able to track them better if you’re not using a wide angle lens.
Also ensure that the background remains consistent as it would make post processing in Photoshop that much easier. If there’s a stationary horizon in the photos, it would also make aligning them more effortless.
2.) Camera Equipment & Settings
For best results, use a tripod. However, if you were like me and left one at home, then a steady hand and plenty of lighting would be the next best thing.
Find a wide angle lens and set it to a smaller aperture (f8 or even f11) to capture and focus more in the photos. Depending on the action, make sure that the shutter speed is faster than 1/500 so it freezes the action, rather than create motion blurs.
Set your camera to action or burst mode and just capture as many shots as you can. You can always delete photos later on.
3.) Select the Right Photos
Including all the images you’ve taken can create a rather messy final photo. You might like to exclude some photos in between to have some more space. Or you might like to overlap some but not others. Decide what kind of effect you wish to create.
4.) Layer Up in Photoshop
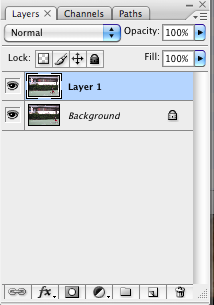
Open up the first image of your sequence in Photoshop. Then, open up your second image and drag that into your first image. Photoshop will automatically create a new layer called “Layer 1.”
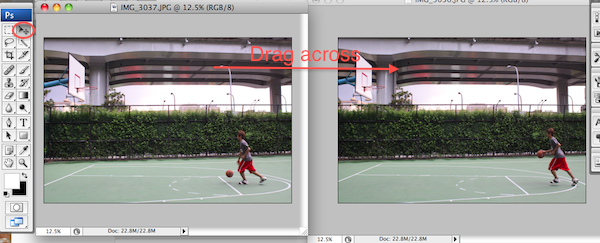
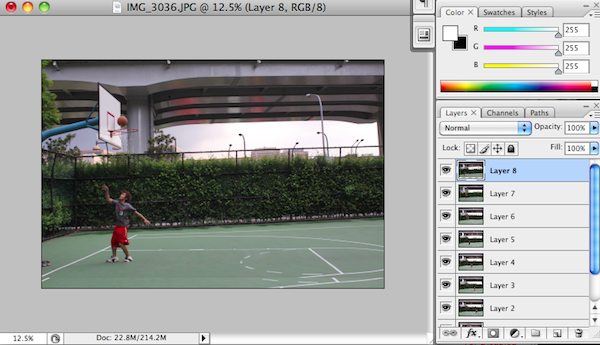
Repeat that until you have all the photos in the sequence all layered on top of the first photo.
5.) Start Aligning
First, make all the layers invisible, except for the Background layer and Layer 1. Also decrease the opacity of Layer 1 to 50%.
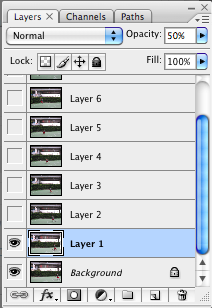
It should look something like this:
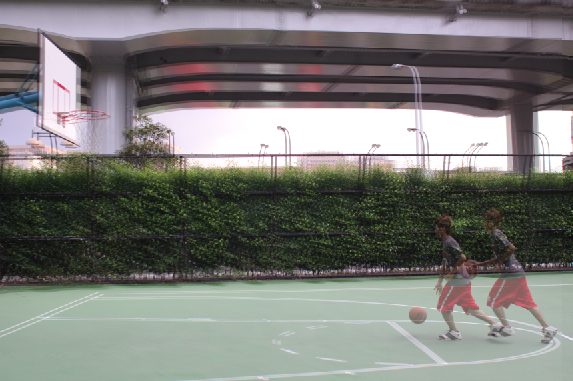
Now, using Free Transform (found under the Edit menu), try to align stationery points closest to the top layer. So for the photo above, I would try to align the basketball court lines. As the player is about to shoot, I would then try to align the basketball ring.
Keep repeating this step until you have completed all layers. Keep in mind to always work with the Background Layer as the base. You would always have Background Layer visible and the other layer set to 50% opacity.
6.) Edit and Delete
You can really start to get a feel of the final photo once you’ve aligned everything and have it on transparency. This is when you can start deleting some layers, like parts where it might overlap.
After you’ve done this, set EVERYTHING to invisible except for Layer 1 and set the opacity back to 100%. Grab the eraser tool and start to get rid of everything you don’t need. You don’t have to be so accurate and you’d get something like this:
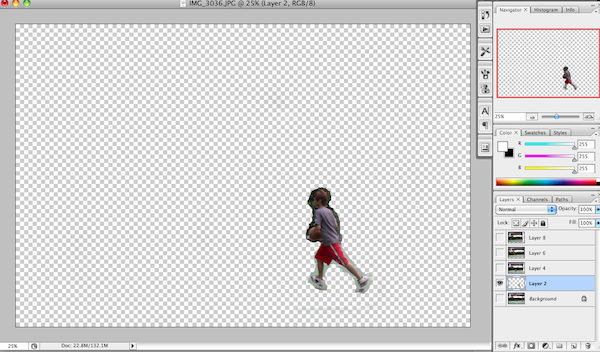
Repeat for all the other layers.
7.) And You’re Done!
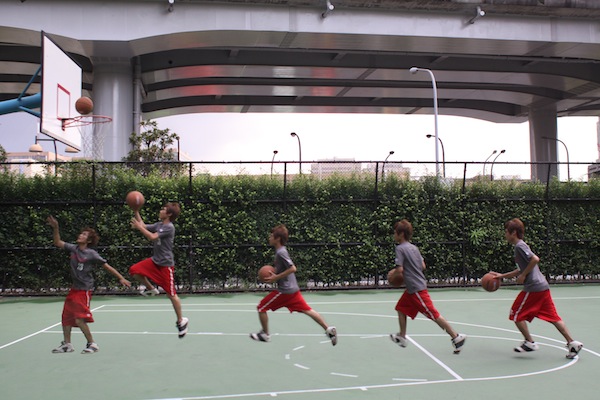
Once you’ve completed the previous steps, make all layers visible. You should end up with an action sequence shot photo!