Photoshop Touch Up 101: Smooth, Brighten & Polish Skin Textures

May 17, 2010 · 30 comments

in Photoshop Tutorials

Photo manipulation in Photoshop isn’t hard. Follow these quick and simple steps in Photoshop and you can convert any mediocre portrait to a photo that fits into a glamor magazine.

You might think it’s a nice photo you’ve just taken of your friend. However, your friend is probably thinking, “Ugh, look at my skin in that photo, I look terrible!” Nowadays, being a good photographer also comes the responsibility of making sure your subject looks his/her best in the photo.

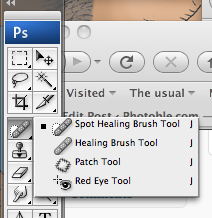
1.) Touch up on those spots with the Spot Healing Brush Tool

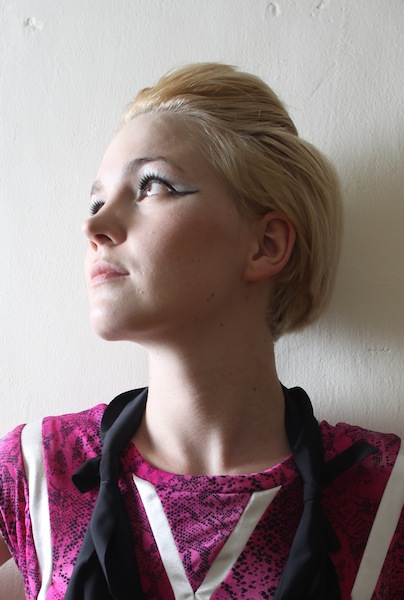
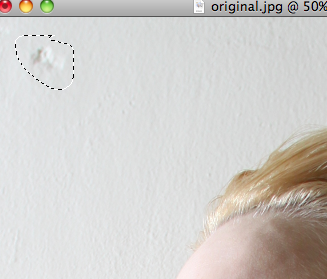
This is a photo of a beautiful model I shot for Rice Society clothing range. I think she looks great already, but when it comes to fashion photography, we’re going to zoom in and fix up those spots.

The easiest way to fix the spots is by using the Spot Healing Brush Tool. Select it and simply click on the spots. Make sure the brush fits around the spot you want to eliminate, but don’t make it too big. You might find yourself adjusting the size of the Spot Healing brush.


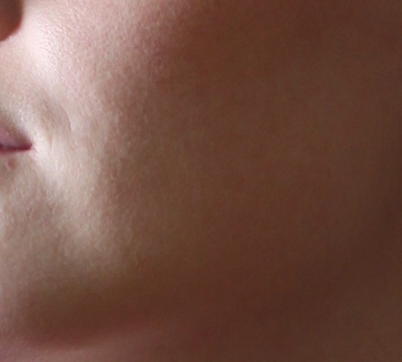
Before (left) and After (right)

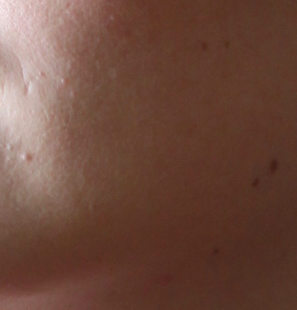
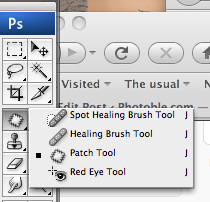
2.) Remove some deep wrinkles with the Patch Tool

Don’t worry about the finer wrinkles, but for the obvious lines, I’d like to use the Patch Tool to eliminate them.

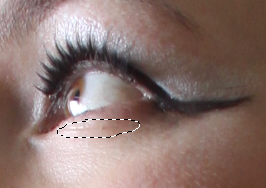
After selecting this tool, simply circle the line you wish to eliminate

Now click in the circle and drag this outline to a smoother textured surface that matches the skin color.

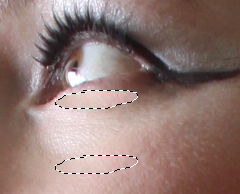
Once you’re done, click away and you can notice the difference.

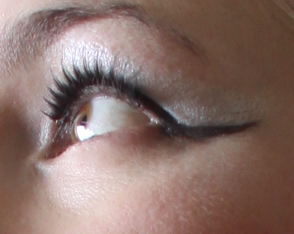
The patch tool is also great for correcting minor skin discoloration and texture too. Don’t just focus on the model as you can also potentially fix some background inconsistencies too!

3.) Soften the skin and iron out the fine lines

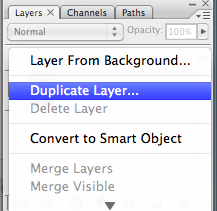
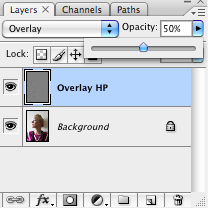
Firstly, duplicate your current layer by right clicking it and call the new layer Overlay HP

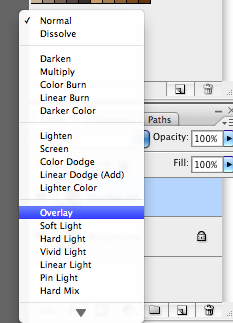
On the Overlay HP layers, change the blending mode to Overlay. You’d notice that your image is now very high in contrast.

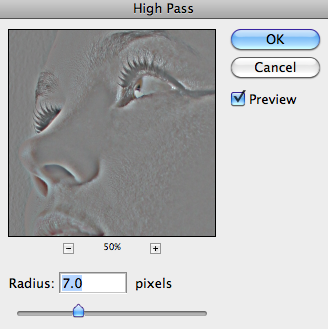
Next, we’re going to apply the High Pass filter.
Filter > Other > High Pass

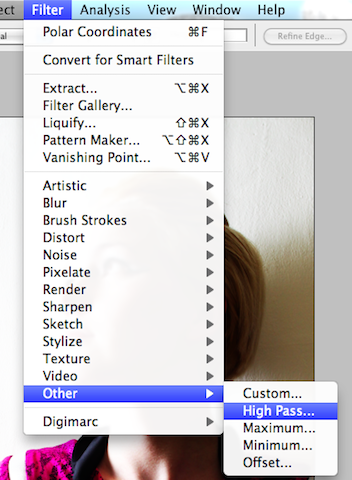
We’re going to crank up the radius to between 5 – 9, depending on the resolution of the photo (higher resolution of the photo, bigger the radius number). What this would do is sharpening all the finer lines. You’re probably thinking, “Huh?! Aren’t we suppose to be smoothing out the lines?”

Don’t worry, we’d be inverting this photo so sharpening in this case will translate to softening.

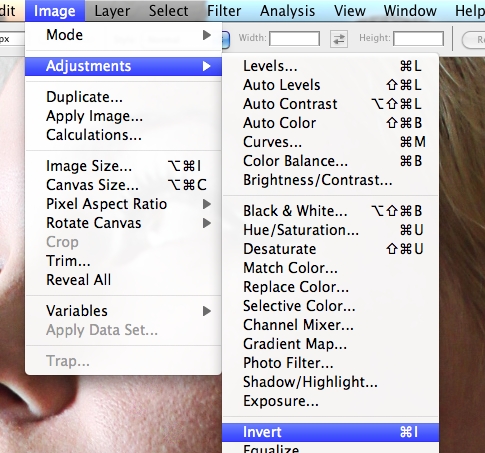
Now, invert the Overlay HP layer.
Image > Adjustments > Invert

You’re probably thinking the photo is now way too soft, dreamy and dewy. So let’s slide down the Opacity of the layer to about 50%.

4.) Bring out the details of certain aspects

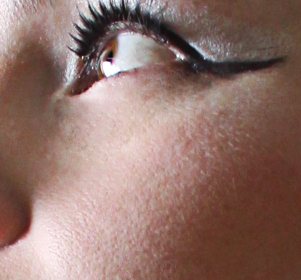
The skin should look soft and supple, but I want to bring out the details of the lips, eyes, brows, hair and clothes. To do this, on the Overlay HP layer, select the eraser tool.

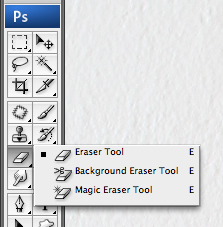
Make sure you use a soft brush with lots of feathering and adjust the Opacity and Flow levels to 50%.

Now just brush the areas you want to sharpen and focus more. And once you’re happy happy, merge down the layer.
Layer > Merge Down

5.) Final adjustments

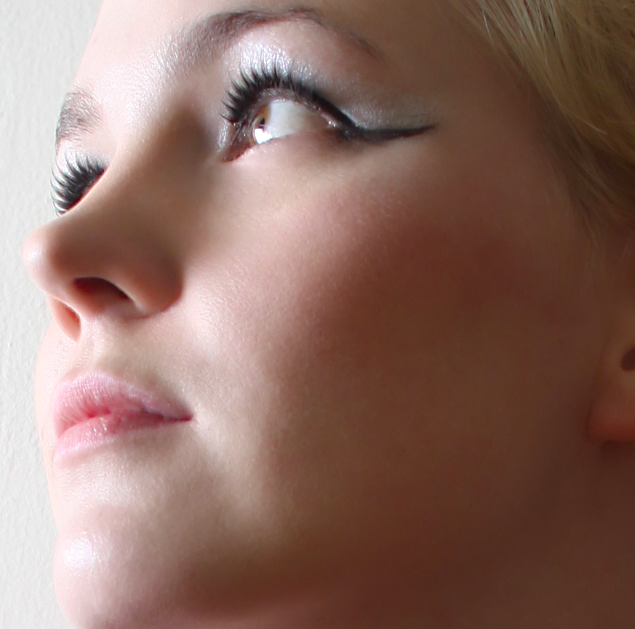
You can choose to make your usual final adjustments such as Curves, Sharpen and Saturation. With this photo, I’ve just slightly increased the saturation a bit. Here’s the final product:
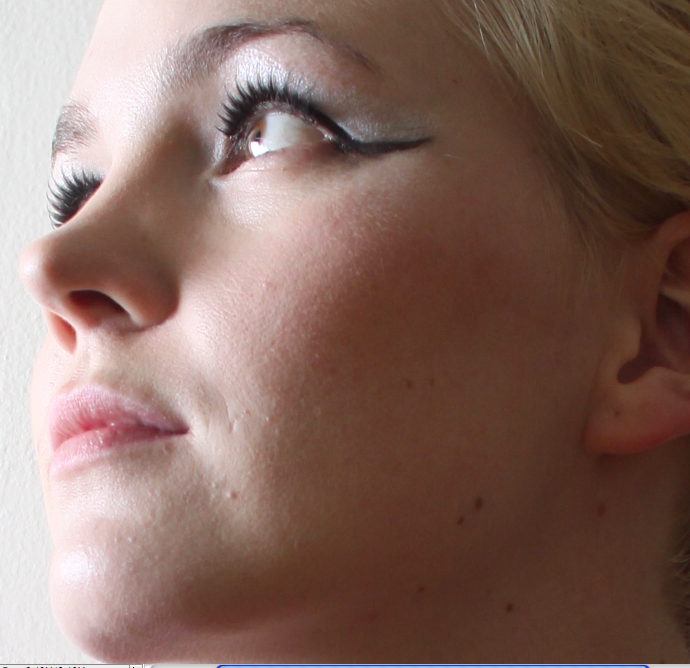
Before close up:


After close up:

Article by

1 part ad agency. 2 parts freelancer. An avid urban photographer, traveler, and streetwear lover. Geeky curator of all things awesome. Sustains on Vegemite, meat pies and lamingtons. Follow me on Twitter or Flickr.

Yi has written 69 awesome articles for us at Photoble

  • Pingback: 5 Photoshop Tips To Make Your Photos Look Like Top Models | Top Web Today

  • McFuck

    Why would you remove someones freckles?
    Not pretty enough?

  • McFuck

    Why would you remove someones freckles?
    Not pretty enough?

  • http://www.twitter.com/yiiee Yi

    Please read the post before making a comment like this. As I stated, I think she looks great, but unfortunately, sometimes clients or models would tell you to get rid of spots. If you’re going to take this post out of context, then I think you should start by writing one of those angry letters to beauty magazines and maybe even Photoshop too. CheersYi

  • McFuck

    Why would you remove someones freckles?
    Not pretty enough?

  • http://www.twitter.com/yiiee Yiie

    Please read the post before making a comment like this. As I stated, I think she looks great, but unfortunately, sometimes clients or models would tell to get rid of spots.

    If you're going to take this post out of context, then I think you should start by writing one of those angry letters to beauty magazines and maybe even Photoshop too.

    Cheers

    Yi

  • Captain Obvious

    @ mcfuck: You should try reading comprehension. It really answers most stupid questions and keeps u from looking like a fool. Nice try u Mcfucking idiot.

  • Captain Obvious

    @ mcfuck: You should try reading comprehension. It really answers most stupid questions and keeps u from looking like a fool. Nice try u Mcfucking idiot.

  • Captain Obvious

    @ mcfuck: You should try reading comprehension. It really answers most stupid questions and keeps u from looking like a fool. Nice try u Mcfucking idiot.

  • dkv

    The before image is better and looks real!
    The after looks artificial….

  • dkv

    The before image is better and looks real!
    The after looks artificial….

  • dkv

    The before image is better and looks real!
    The after looks artificial….

  • http://www.twitter.com/yiiee Yi

    *sigh* There were a few other ways I could’ve approached this, but I thought this process retained more of the natural look as opposed to a total airbrushed look.

    Compared to most touched up photos, the ‘after’ in this process still has the finer features like the pores, hairs, and natural textures.

    Ah well, looks like you could never win with photo touch-ups.

  • Dorie

    I think this is great. She looks amazing and quite natural in the after pic, and so much more professional! These tools are definitely going into my Photoshop arsenal now. πŸ™‚
    Thanks!

  • http://www.twitter.com/yiiee Yiie

    *sigh* There were a few other ways I could've approached this, but I thought this process retained more of the natural look as opposed to a total airbrushed look.

    Compared to most touched up photos, the 'after' in this process still has the finer features like the pores, hairs, and natural textures.

    Ah well, looks like you could never win with photo touch-ups.

  • Dorie

    I think this is great. She looks amazing and quite natural in the after pic, and so much more professional! These tools are definitely going into my Photoshop arsenal now. πŸ™‚
    Thanks!

  • http://www.twitter.com/yiiee Yi

    Thanks Dorie for the positive feedback! I’m glad someone liked this tutorial πŸ™‚

  • http://www.twitter.com/yiiee Yiie

    Thanks Dorie for the positive feedback! I'm glad someone liked this tutorial πŸ™‚

  • max

    Great work. this is the shortest way to touch up the photo i ever find

  • max

    Great work. this is the shortest way to touch up the photo i ever find

  • Chu

    Please disregard all previous ignorant comments. Some people never appreciate other’s hard work. (I had a boss like that once…)

    You really did an amazing job with this models face, while retaining her natural beauty. While I don’t mind a few freckles, (makes it more real for me,) I understand that’s not the point of this tutorial, only to teach how to remove skin blemishes. And you sure do a great job at that.

    Thank you.

  • http://www.twitter.com/yiiee Yi

    Thank you Chu! That was one of the nicest comments I’ve read. πŸ™‚

    Glad you liked the tutorial. I have freckles myself and would never Photoshop them out. But I’m glad you understood the basic concept behind this tutorial.

    Cheers

    Yi

  • Chu

    Please disregard all previous ignorant comments. Some people never appreciate other's hard work. (I had a boss like that once…)

    You really did an amazing job with this models face, while retaining her natural beauty. While I don't mind a few freckles, (makes it more real for me,) I understand that's not the point of this tutorial, only to teach how to remove skin blemishes. And you sure do a great job at that.

    Thank you.

  • http://www.twitter.com/yiiee Yiie

    Thank you Chu! That was one of the nicest comments I've read. πŸ™‚

    Glad you liked the tutorial. I have freckles myself and would never Photoshop them out. But I'm glad you understood the basic concept behind this tutorial.

    Cheers

    Yi

  • JB

    This looks great and am wondering if there is a way or an equivalent technique that would work in Elements 6? I do not have full photoshop. Thanks

  • JB

    This looks great and am wondering if there is a way or an equivalent technique that would work in Elements 6? I do not have full photoshop. Thanks

  • http://www.twitter.com/yiiee Yi

    Hi JB,

    I’m not too familiar with Elements 6, but I know there is the patch and heal tool, so you can cover up any spots and lines. For that smooth, dewy look, you can try to apply the filter Gaussian blur to the photo before sharpening it.

    Hope this helps!

    Cheers

    Yi

  • http://www.twitter.com/yiiee Yiie

    Hi JB,

    I'm not too familiar with Elements 6, but I know there is the patch and heal tool, so you can cover up any spots and lines. For that smooth, dewy look, you can try to apply the filter Gaussian blur to the photo before sharpening it.

    Hope this helps!

    Cheers

    Yi

  • http://www.adroitclippingpath.com Jahid Babu

    very much informative and helpful, thanks for sharing this tutorial

Previous post:

Next post: