Photoshop Watercolor Effect Tutorial: From a Photo to a Masterpiece in 5 Steps
Turn your photo from, “Oh, that’s nice” to, “Wow, did you paint this?” in a few easy steps. This Photoshop tutorial will show you how to turn any photo into a watercolor masterpiece.
A lot of people have asked if you need to have a stunning photo taken with a DSLR in order to do these Photoshop tutorials. Of course not! To demonstrate this, I’m using an average photo taken with a regular point and shoot (Panasonic Lumix).
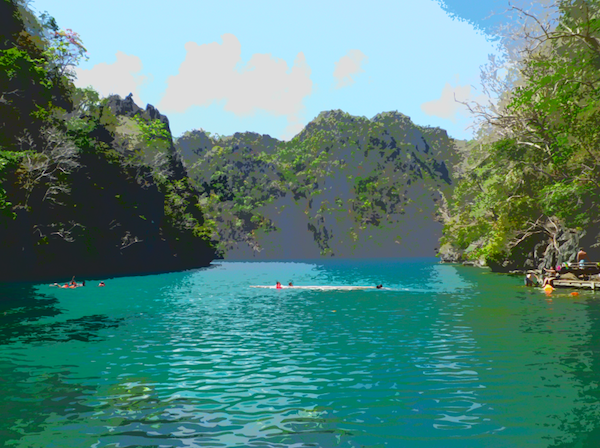
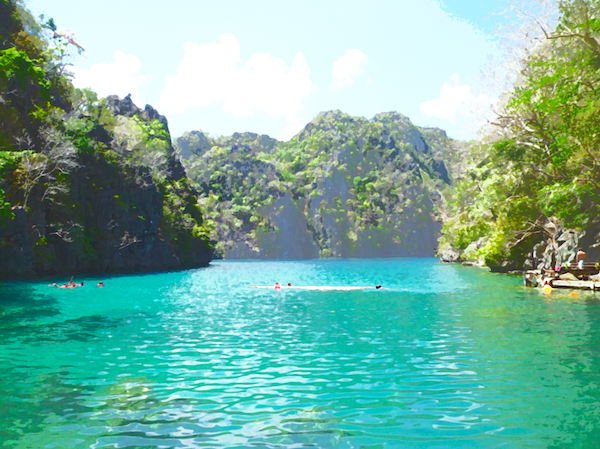
For this tutorial, you will need to find a photo that’s vibrant with bright colors. Night shots can still work, as long as it’s not too dark and has varying color contrasts. I’m using a photo taken in Coron, Philippines.
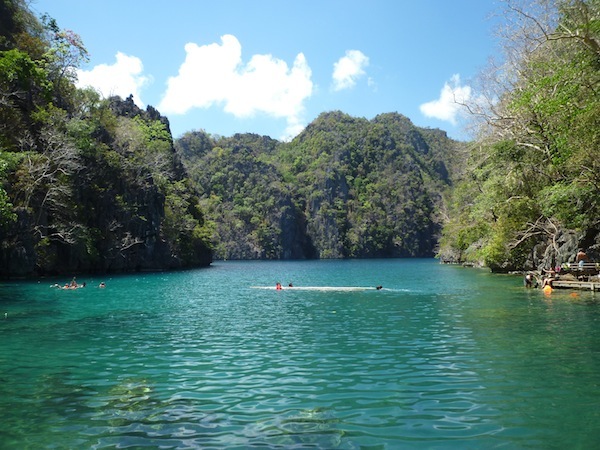
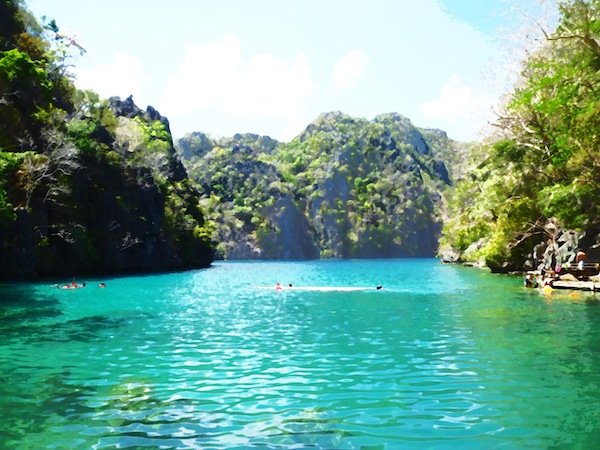
We will turn the above photo, into something like this:
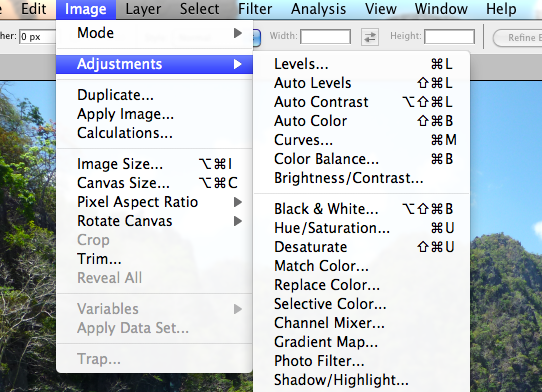
1. Adjust the Brightness/Contrast
Open the photo up in Photoshop and adjust the brightness and contrast.
Image > Adjustments > Brightness/Contrast
We really want the colors to pop. I’ve cranked up the Brightness to +8 and Contrast to +20.

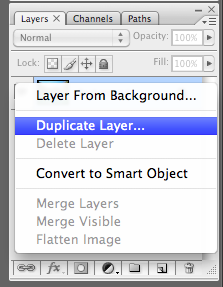
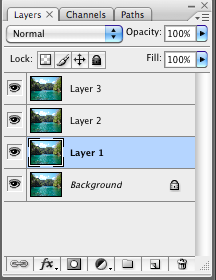
2. duplicate the Background layer
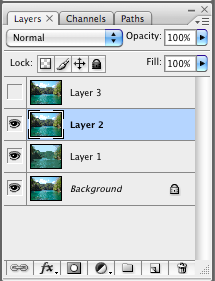
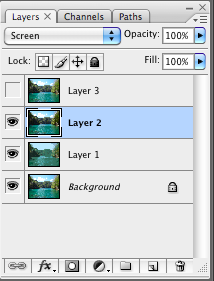
Duplicate the background layer three times, and name them Layer 1, Layer 2 and Layer 3.
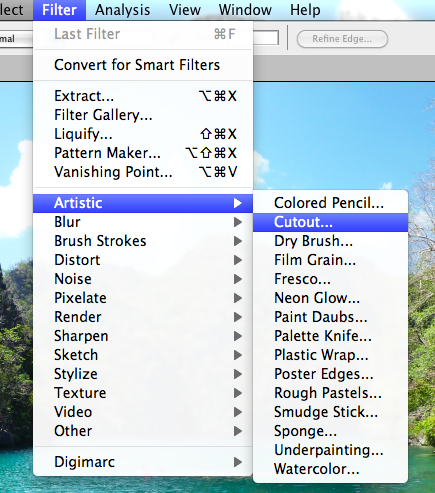
3. Apply the Cutout Filter
Click on Layer 1 and apply the Cutout Filer.
Filter > Artistic > Cutout
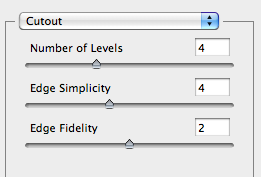
A popup should appear. You can play around with the levels, but I like to use the default levels and find that works well with most photos.
Number of Levels: 4
Edge Simplicity: 4
Edge Fidelity: 2
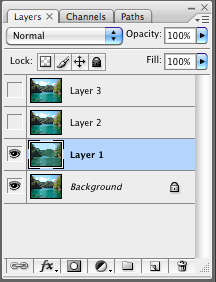
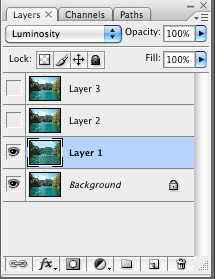
To see the effect applied to Layer 1, you would need to ‘hide’ Layers 2 and 3. This is easily done by clicking on the eye icon next to the layer image. Click to hide and unhide.
On Layer 1, adjust the blend mode to Luminosity in the drop down.
After you’ve done that, you should see something similar to this:
4. Apply Dry Brush Filter
Unhide Layer 2 and click on it.
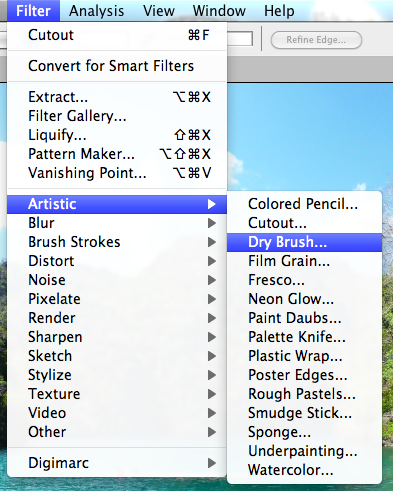
We’re going to apply the Dry Brush Filter to this layer.
Filter > Artistic > Dry Brush
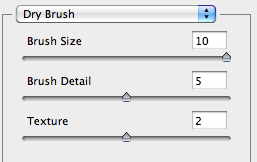
Again, have a play around with the levels to create your desired look. I find that using a larger Brush Size creates a more ‘watery’ image. For this, my levels were:
Brush Size: 10
Brush Detail: 5
Texture: 2
Change the blending mode for Layer 2 to Screen. You’d notice the image to be a lot brighter.
5. Applying the Median filter
Ok, now unhide Layer 3 and click on it. We’re going to apply the Median filter.
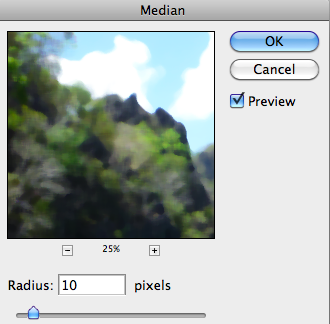
Filter > Noise > Median
The Median filter tool will blur some of the details without blurring too much of the outline. That way, most of the shapes will be retained. I’ve set the radius to 10 for my image.
After you’ve done that, set the blending mode for Layer 3 to Soft Light.
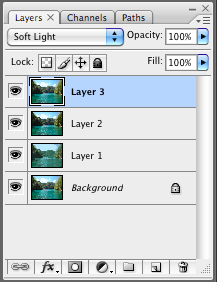
Presto, there you have it! Make sure that all three layers are showing and you should end up with a final image like this:
I’ve left it as it is, but feel free to adjust the Brightness/Contrast levels again.
How did your masterpiece turn out? Show us a link!