
One of the most important things to keep in mind when you are shooting is that the general rules you follow as a photographer are up to you to use and change as you feel is appropriate in each situation. When you are being trained in photography or ask for advice from other people, there are going to be endless amounts of rules that are given that you are told to follow to create “correct” photographs. They range from equipment and techniques to composition and subject matter. Many of these “rules” are good foundations to shoot amazing photos but photographers, whether professional or amateur, should never feel bound to these rules as absolutes. It is up to you as the photographer to create compositions based on all the elements around you, not just what you have been trained or what other photographers do. I will show examples on how some of the rules are meant to be broken.
1. Angling the Camera vs. Straight On

©Elizabeth Anderson, 2010 www.design-flip.com

©Elizabeth Anderson, 2010 www.design-flip.com
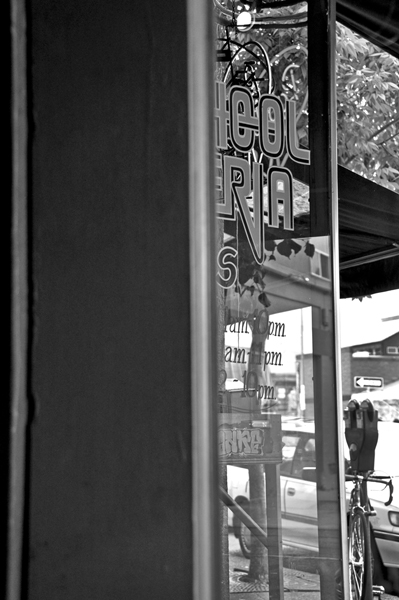
The general rule that people are taught is that shots make more sense when the camera is straight. Shots taken from an angle are thought to seem confusing. These two photographs show an old sign I shot recently in Washington state. The first two are shown from a straight angle. There is nothing wrong with these shots at all, but mainly because I wanted to show more of the typography and the quirkiness of the letters, I chose to also shoot the sign at an angle.

©Elizabeth Anderson, 2010 www.design-flip.com

©Elizabeth Anderson, 2010 www.design-flip.com
To me, this was a much more interesting and powerful approach that added to the slight spookiness and tension of the abandoned sign and location.
2. Centering the Subject
Most photographers are told never to center the subject matter in the composition because it makes the space boring and too even on all sides. I find this to be true in general because uneven negative space can make the image more powerful. But, in some cases, centering can have the exact same effect.

©Elizabeth Anderson, 2010 www.design-flip.com
This first shot shows a dirt, farmland road with an example of how the main subject (the telephone posts) could be shot off center. This works in this case because the composition also includes the dirt pathway which leads the eye. This approach is often the recommended way to create a photograph.
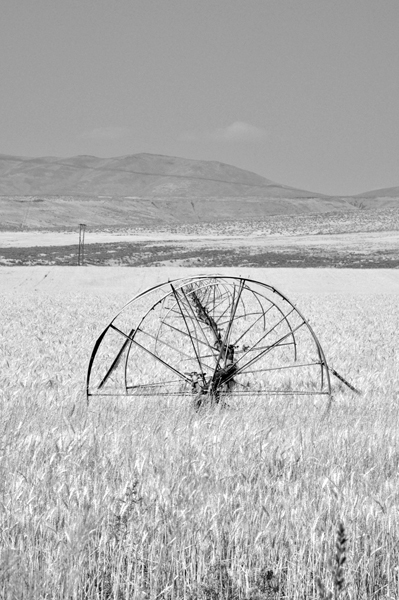
©Elizabeth Anderson, 2010 www.design-flip.com
In this case, the farm equipment is place in the center of the shot. It creates a sense of symmetry, especially with the half circle shape of the mechanism. Centering the subject matter is completely up to you and depends on, as you look through the camera, what makes sense for the composition.
3. Crop Out Blurred Elements
Often when shooting, movement or objects right in the foreground can create a blur that you are not expecting or do not want to include in the shot. Photographers are so often told to crop, crop, crop shots after the image has already been taken. I am a firm believer in embracing some of the elements that you did not mean to include. Most of the work can be done in the camera if you sharpen your eye, the more you photograph.
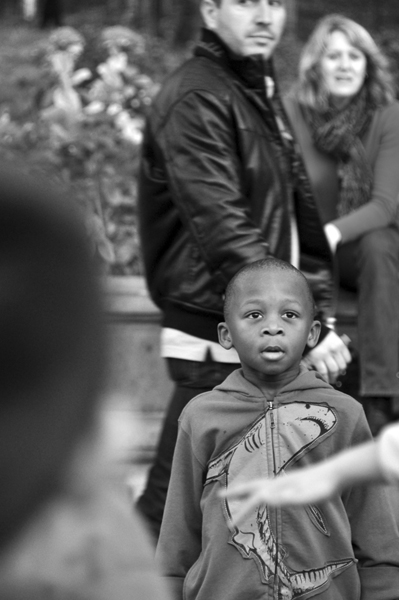
©Elizabeth Anderson, 2010 www.design-flip.com
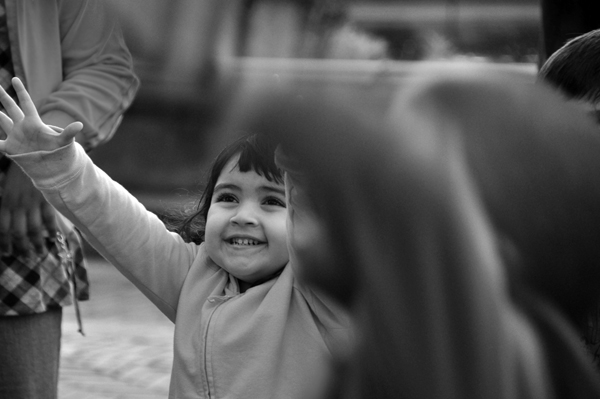
©Elizabeth Anderson, 2010 www.design-flip.com
©Elizabeth Anderson, 2010 www.design-flip.com
Each of these shots has something in the more immediate foreground which are not the focus of the shot. They could have been cropped to remove the blur, but I felt that the half information or implication of movement made the pieces in focus, much more powerful.
4. Framing the Shot
Framing each shot is also a popular method for creating a complete composition. This involves adjusting your frame so that content is placed around or to the sides of the main subject matter. This creates a sense of “framing” the piece and also harmony where each side is equally weighted. But, sometimes this kind of composition is not possible because of the landscape or is not necessary to create a beautiful photograph.
©Elizabeth Anderson, 2010 www.design-flip.com

©Elizabeth Anderson, 2010 www.design-flip.com
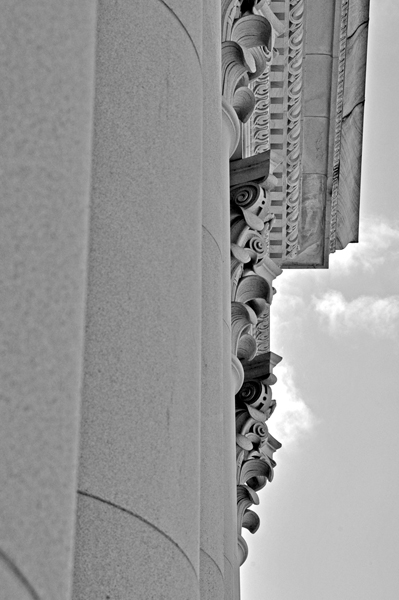
These two photographs are heavily weighted to one side with no framing. This was done to accentuate the contours of the architecture and emphasize the sky.
©Elizabeth Anderson, 2010 www.design-flip.com

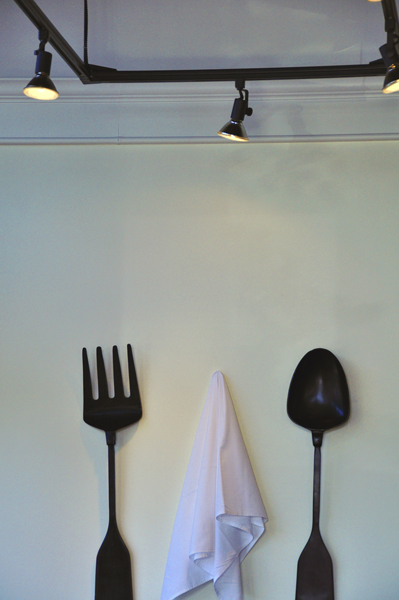
©Elizabeth Anderson, 2010 www.design-flip.com
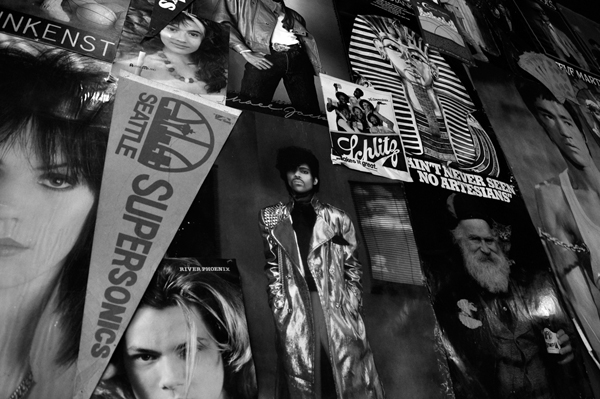
In these two cases, I was interested in the texture in the shots and framing was for one not possible because of the space and not necessary because the other content was more interesting. In these cases, framing the photograph does not add to the composition. The flatness is secondary to the amount of information.
5. Glare
Should you always point your camera in the opposite direction of the sun? The answer is that it depends. Sometimes yes because it can highly distort the color and exposure of the shot. But, in some cases, embracing the glare can add intense emotion and landscaping touches.
©Elizabeth Anderson, 2010 www.design-flip.com
©Elizabeth Anderson, 2010 www.design-flip.com
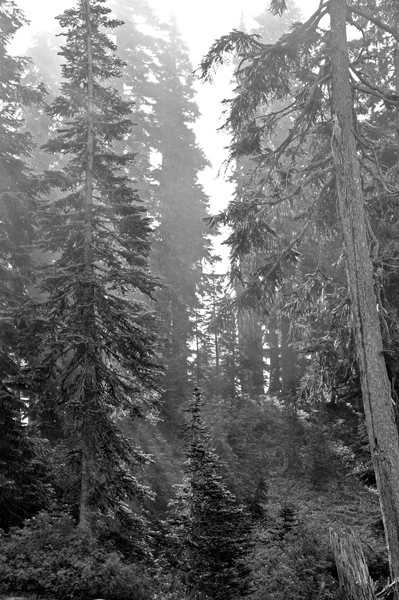
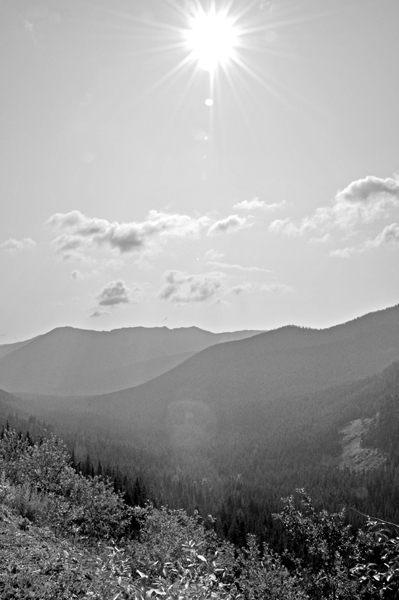
In both of these cases, I shot directly into the sun and included it in the image. In one case, it added to the fog and dappling of light in the trees. In the other, it added to the majesty and enormity of the location.
6. In or Out of Focus
In most cases, keeping things in focus creates a more professional looking photograph. But, often a motion blur is used intentionally to add excitement to an active shot. If an unintentional, out of focus image is created, it might be something to see as unique rather than a mistake.
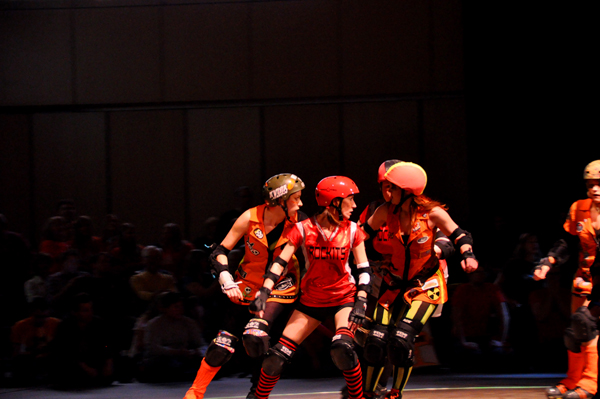
©Elizabeth Anderson, 2010 www.design-flip.com
In this shot, the moving subjects are in focus, which helps show their unique costumes and facial expressions. But, it also adds a static feeling to an activity that is high movement and energy.
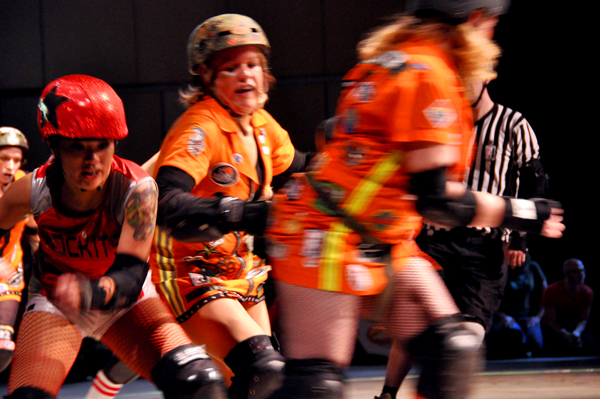
©Elizabeth Anderson, 2010 www.design-flip.com
Even though this lacks of focus was unintentional as the women passed by me, I love the way it turned out. The movement and even lack of sophistication seems completely appropriate for the subject. Including a blur can add a lot of value.
7. Leading Lines
Photographers are also told to use leading lines, especially in landscapes, to add a narrative path for the eye to follow on a photograph. These lines are natural occurrences in the space that you can use to your advantage to lead the eye.
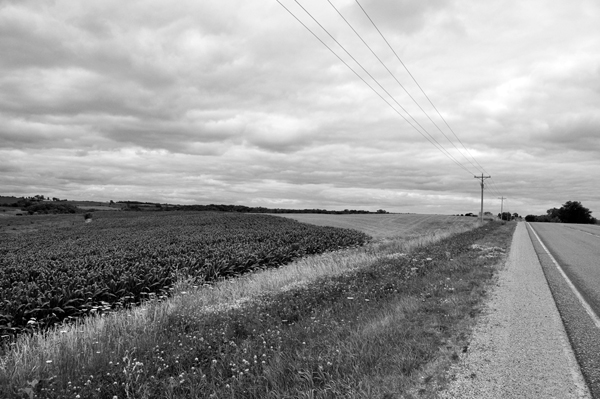
©Elizabeth Anderson, 2010 www.design-flip.com
©Elizabeth Anderson, 2010 www.design-flip.com
The leading lines in these photographs are the edge of the shore, the fence and the road leading through the landscape. These lead the eye from one side to the other and also from top to bottom. They are strategic compositional lines.
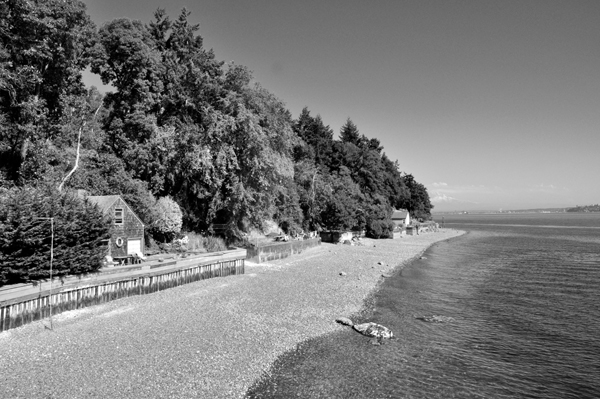
©Elizabeth Anderson, 2010 www.design-flip.com
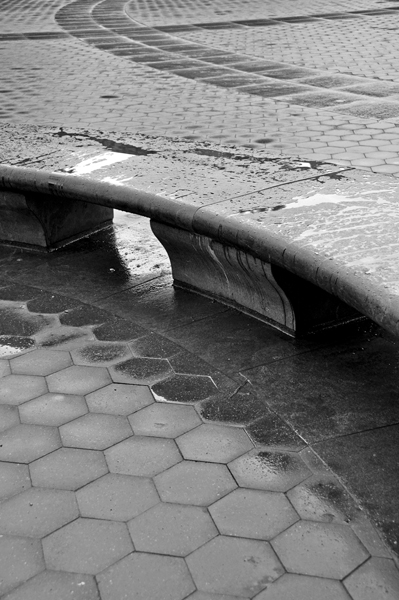
©Elizabeth Anderson, 2010 www.design-flip.com
In these two cases, the lines in the space are less obvious and lead you nowhere. They either go in every direction with no discretion or from one side to the other with no content. Does this make it a less effective composition? That is up to the photographer. To me, the composition is just as strong because of the other content and the simplicity of the area. The eye can still move around the space without having these lines.
8. Portraits
In the world of photographing portraits, there are endless rules for effective shooting. Do not crop the face. Show the face. Do not center the person in the space. In some cases, this is completely true, but not absolute.
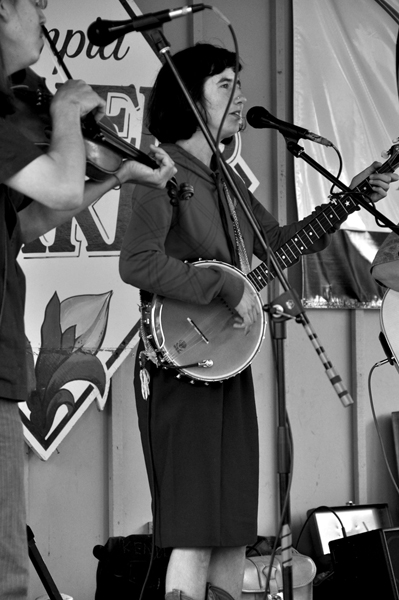
©Elizabeth Anderson, 2010 www.design-flip.com
This example shows a “proper” portrait shot. Her face is completely shown and the rest of the area is abstracted so that she is the focus. To me, this approach is fine but lacked any individuality or unique interest. What was most interesting was the banjo she was playing.

©Elizabeth Anderson, 2010 www.design-flip.com
This is still a portrait even though I broke the rule of cropping the face. Her fingers and the instrument were the focus more than her face. That was the interest of the situation.
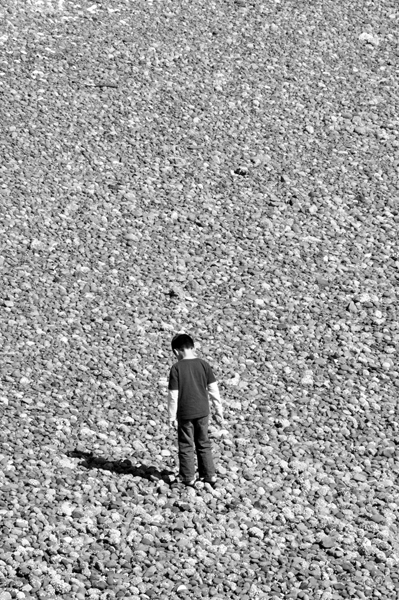
©Elizabeth Anderson, 2010 www.design-flip.com
In this case, I did center the little boy in the composition because of the landscape. He was surrounded by the rocks on the beach and the contrast of textures was much more effective this way. It makes him see so innocent in the large space. It was a more interesting narrative than a zoomed in, off-center approach.
©Elizabeth Anderson, 2010 www.design-flip.com
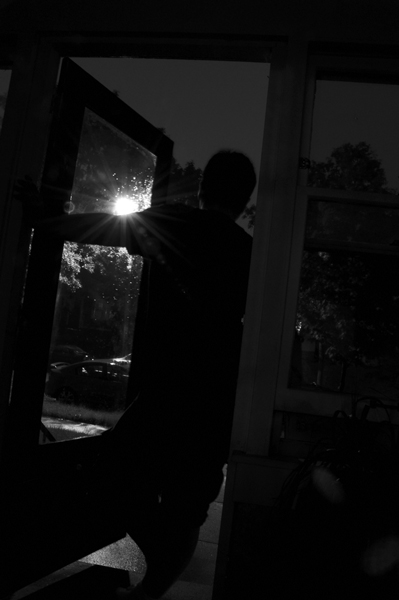
The back of someone, especially not showing their face, is still a portrait even though it is unconventional. This story was about contemplating the storm that had hit one night, rather than the facial expressions. The silhouette, including the angle of the body and arms against the open porch door was very important. The main light is focused outside and not on the subject himself. But this is a more intriguing photograph than something straight on and obvious.
As a photographer, do not become so overwhelmed or bogged down with the rules that you stop experimenting and making the compositions for yourself. What makes good photography is the photographer creating their own visual language. The rules can help you understand the fundamentals of the techniques but not how to find the passion for shooting. The rules are not laws and should not take out the joy of the process and seeing things in a new way.

