Retro Color Effect Photoshop Tutorial

October 26, 2010 · 14 comments

in Photoshop Tutorials

Retro color effect is indeed very popular. A quick search in Google brings up endless of Photoshop tutorials. However, this tutorial is probably one of my favorites to achieve a retro color effect. Simply because it’s quick, easy and thinks outside the box.

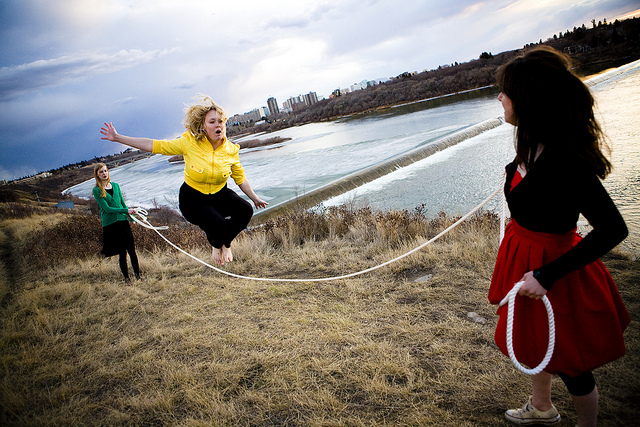
The image I will be using was featured in our Jump Photo Collection. Photo thanks to jumping lab.

1.) Preparation

Open up the photograph and duplicate the layer by right clicking the background layer and selecting Duplicate Layer.

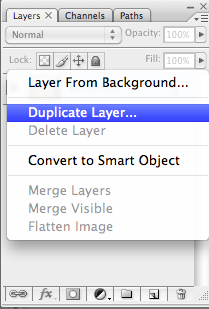
Before proceeding, make sure you’re working with the duplicate layer by ensuring that it’s highlighted.
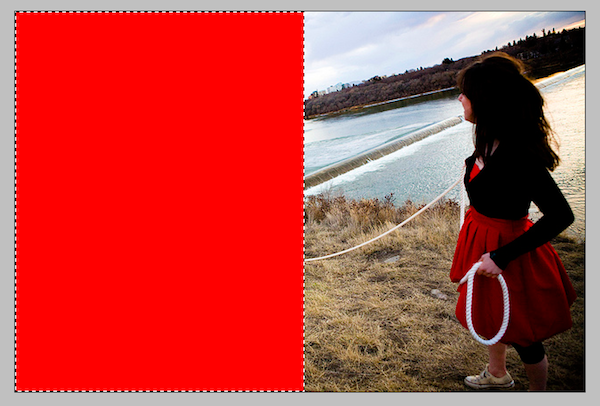
2.) Select

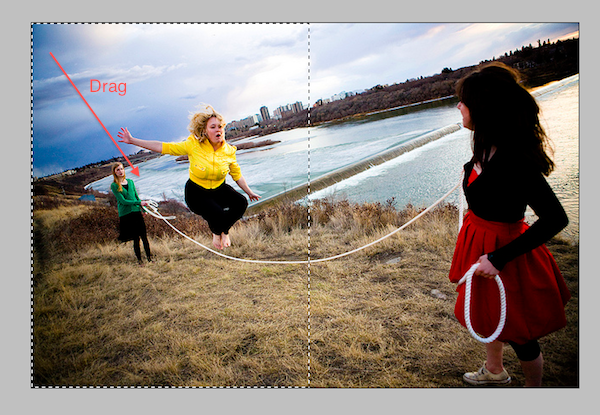
Using the Rectangular Marquee Tool, drag and select half the image.
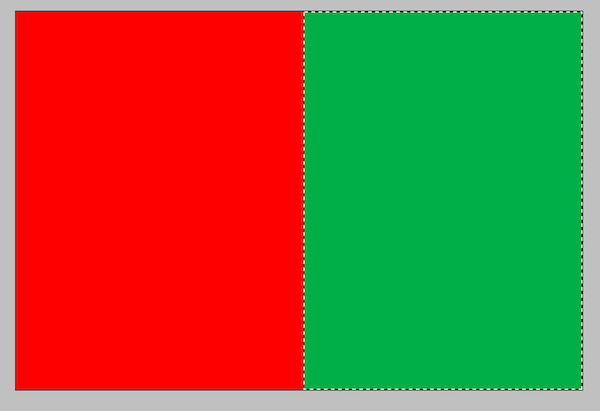
3.) Color Fill

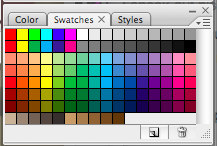
Select the red color from the Color Swatch. Now, fill the selection with the red with the shortcut ctrl+backspace

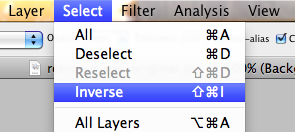
Now, inverse this selection. This would select the other half of the image.
Select > Inverse

Fill the other selection with a green color. You will end up with something like this:
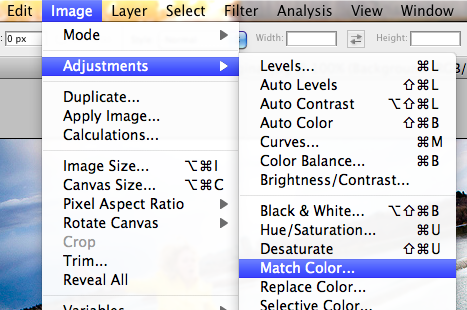
4.) Match Color

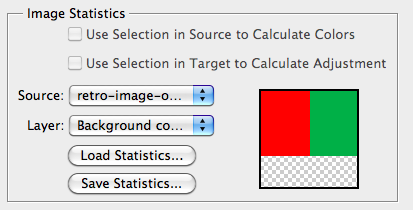
Now, hide the duplicate Background Copy layer by clicking on the eye icon. Click on the Background layer. Then, click on Match Color in the menu bar.
Image > Adjustments > Match Color

Under Image Statistics, make sure the Source points to your original image. For the Layer, select Background Copy layer.

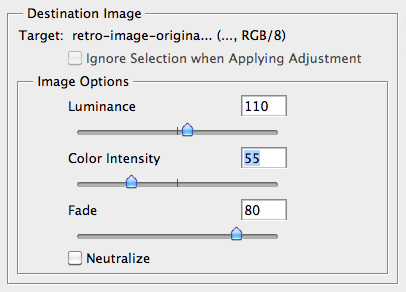
Your image might look a bit odd, but here’s where the fun begins as you play around with the Image Options.

Start with Fade and increase the levels, until the green and red patches blend in with the photo. Next, decrease the color intensity until you’re happy with the result. You don’t need to do anything with Luminance, unless you want to decrease or increase the brightness.

And there you have it:
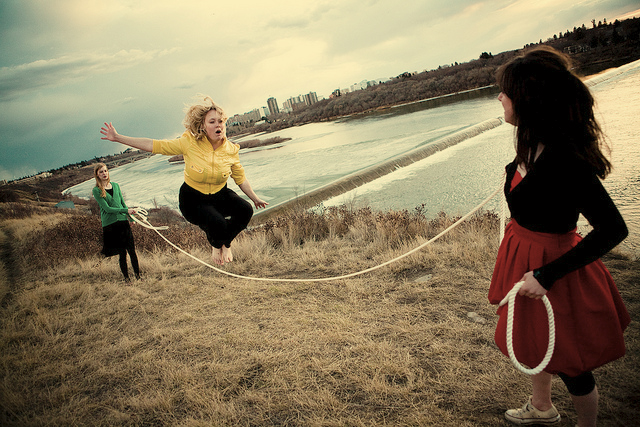
Before:

Article by

1 part ad agency. 2 parts freelancer. An avid urban photographer, traveler, and streetwear lover. Geeky curator of all things awesome. Sustains on Vegemite, meat pies and lamingtons. Follow me on Twitter or Flickr.

Yi has written 69 awesome articles for us at Photoble

  • Guest

     i couldn’t seem to get it right when it comes to the Match Colour step. 

  • http://www.twitter.com/yiiee Yi

    Which version of Photoshop are you using? I know that Color Match isn’t included in the older PS programs.

  • Alexajames

     I think the step that’s missing is to deselect the second rectangle before choosing ‘match color.’

  • http://pulse.yahoo.com/_NNMRZHETR2QDE5AQOJN4R4YG5M ChrisP

    I tried this tutorial, and I can’t get the match color step to work either. It’s deselected. But adjusting the sliders doesn’t do anything (except for the luminance one).

  • Hans_reborn

    thnx for the tutorial, it works well hahaha, for those who failed maybe u guys forget to set the layer at image static to the background copy layer

  • http://pulse.yahoo.com/_NNMRZHETR2QDE5AQOJN4R4YG5M ChrisP

    Or maybe that wasn’t really mentioned in the tutorial at all.

  • Wece

    Awesme

  • Sksaha0

    wowowowowowoow it`s nice

  • Sksaha0

    wowowowowowoow it`s nice

  • JB

    this is awesome. worked fine with cs2. thanks! 🙂

  • Charbo

    I’ll try,thx

  • http://www.facebook.com/profile.php?id=100000346472710 Shi Han

    thank you so much, i keet finding such tutorial, thank you, thank you, thank you.

  • http://twitter.com/ptr_uthi Putri ツ

    me too :/

  • https://graphicsexpertsbd.com/shadow-creation Alaxe

    Really amazing color effect and the method is very easy, I like it, Thanks for sharing!!!

Previous post:

Next post: